In the fast-evolving sectors of manufacturing, oil & gas, and aerospace, understanding Positive Material Identification (PMI) is paramount for ensuring safety and compliance. Research indicates that approximately 20% of all manufacturing defects stem from improper materials, which underscores the need for reliable identification techniques (Source: National Institute of Standards and Technology). This article will dissect the various common PMI techniques, including X-ray fluorescence (XRF), Optical Emission Spectroscopy (OES), and Laser-Induced Breakdown Spectroscopy (LIBS), while also highlighting the importance of non-destructive testing (NDT) in the PMI process.
Key Takeaways
- Positive Material Identification ensures material integrity.
- XRF, OES, and LIBS are efficient PMI methods.
- Non-destructive testing preserves material integrity.
- Quality assurance enhances reliability and safety.
- Compliance with standards mitigates regulatory risks.
- Material properties vary across industrial applications and sectors.
Quality controls, through PMI practices, are addressing regulatory compliance, and assessing material properties for diverse industrial applications. Professionals gain valuable insights that are critical to maintaining high standards on their products.
Common PMI Techniques

Positive Material Identification (PMI) techniques ensure the correct identification of materials before, during, and after manufacturing processes. These methodologies employ advanced technologies to verify elemental composition, preventing issues like material mix-ups in critical applications. By utilizing spectroscopic or X-ray technologies, industries can detect differences in alloys with high specificity. In aerospace, a study indicated that 60% of failures in components resulted from material misidentification.
Among the popular PMI methods:
- X-ray fluorescence (XRF): it is widely utilized due to its efficiency in determining elemental compositions of materials. It operates by irradiating a sample with X-rays, which excites the atoms and causes them to emit fluorescent X-rays. These emitted X-rays are then analyzed to ascertain the elemental composition. XRF is particularly valuable for its rapid results, often allowing for real-time assessments, making it a preferred method in the metals recycling industry, where differentiating between alloys can have economic implications. The technique can detect elements from sodium (Na) to uranium (U) with part-per-million sensitivity
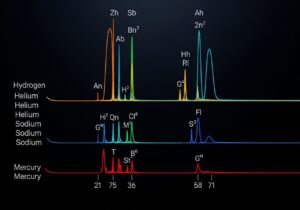
- Optical emission spectroscopy chart (OES): it offers another robust approach, especially for metals. By subjecting a material to a high-energy arc or spark, OES excites atoms which subsequently emit light. The emitted light’s spectrum is analyzed, allowing for precise identification of elemental content. This method is particularly effective for alloys, achieving accuracy levels of up to 0.01%. OES is frequently employed in metallurgical quality assurance, where consistent material properties are critical.
- Laser-induced breakdown spectroscopy (LIBS): it appears promising for analyzing a range of materials including metals, ceramics, and glasses. In this method, a high-energy laser pulse ablates material from the surface, creating plasma that emits light. Analyzing this light provides elemental composition information, capable of detecting elements from hydrogen (H) to uranium (U) at trace levels. LIBS has been effectively utilized in field applications, such as assessing metal contaminants in soil, creating an advantage in environmental assessments compared to traditional methods.

Tip: regular calibration of PMI devices enhances accuracy and reliability. Implement routine checks with certified reference materials to maintain high standards in measurements.
Tip: choose XRF for quick on-site analysis, while OES offers higher accuracy for lab settings. LIBS is beneficial when dealing with diverse materials.
| Technique | Main Industries & Applications | Pros | Cons | Detection Limit |
|---|---|---|---|---|
| X-ray Fluorescence (XRF) | Scrap metal sorting, alloy analysis, mining and geology, quality control in manufacturing, environmental monitoring. | Non-destructive, leaving the sample intact. Fast results, often near-instantaneous results for qualitative identification. Portable and user-friendly, minimal sample preparation. Wide range of elements detectable, especially heavier metals. Can analyze solids, liquids, and powders. | Limited detection of light elements (e.g., Li, Be, B). Primarily a surface analysis technique; coatings or surface contamination can affect results. Accuracy can be affected by matrix effects (sample composition influences fluorescence). Detection limits for some trace elements might be higher compared to OES. Highest accuracy often requires reference standards similar to the sample. | Sub-ppm to 100 ppm for most elements, depending on the element and instrument (EDXRF vs WDXRF). Generally, heavier elements have better detection limits. For micro samples and thin films, can be 2-20 ng/cm². |
| Optical Emission Spectroscopy (OES) | Metal manufacturing and processing (e.g., steel, aluminum), automotive, aerospace, foundries, quality control where high precision is needed. | Highly accurate and precise, especially for trace elements and light elements (e.g., C, N, P, S, B). Wide elemental range, including both heavy and light elements. Provides in-depth analysis of alloy composition. Can analyze carbon and nitrogen on-site. Fast, 3 seconds to 30 seconds for a full quantitative analysis. | Typically requires some sample preparation (e.g., grinding, polishing). Generally not portable; equipment is often large and suited for lab environments. Higher upfront equipment costs compared to XRF or LIBS. Leaves a small burn mark on the sample (destructive). Can be affected by spectral interferences in complex matrices. | Very low detection limits, capable of measuring trace elements down to ppm or even sub-ppm levels depending on the element and matrix. For some elements like Be, Mg, Ca, Sr, Ba, can be tens of parts per trillion (pg/mL) in solution (ICP-OES). |
| Laser-Induced Breakdown Spectroscopy (LIBS) | On-site metal sorting and material identification (e.g., scrap recycling), aerospace (light element analysis), battery manufacturing, geological exploration, industrial process control. | Extremely fast, single spot analysis usually takes a few seconds. Highly portable and versatile for field use. Excellent at detecting light elements (e.g., Li, Be, B, C). Minimal to no sample preparation required. Can analyze a wide range of materials (metals, plastics, soils, biological tissues). | Detection limits are generally not as low as OES or some XRF applications. Accuracy and reproducibility can be affected by matrix effects and sample heterogeneity. Leaves a small ablation crater on the sample surface (micro-destructive). Calibration can be complex and may require matrix-matched standards. Plasma characteristics can be influenced by ambient atmosphere. | Typically in the low-ppm range for heavy metallic elements (1-100 ppm). Can vary significantly depending on the element, matrix, and specific LIBS setup. For some elements in specific matrices, LODs can be improved (e.g., a few ppm for Cr, Cu, Mn, Mg in aluminum alloys). |
Non-Destructive Testing in Effective PMI

Non-destructive testing (NDT) methods serve a pivotal function in material identification, allowing professionals to discern material properties without inflicting damage. Techniques such as ultrasonic testing and radiography provide insights into the integrity and composition of materials. These methods can effectively identify flaws such as cracks or inclusions, which might compromise performance and are essential for assuring safety in critical applications like...
You have read 42% of the article. The rest is for our community. Already a member? Log in
(and also to protect our original content from scraping bots)
Innovation.world community
Login or Register (100% free)
View the rest of this article and all members-only content and tools.
Only real engineers, manufacturers, designers, marketers professionals.
No bot, no hater, no spammer.









Isn’t PMI accuracy highly dependent on the skill level of the operator?
PMI reigns supreme. Other techniques can’t match its cost-effectiveness and accuracy ratio.