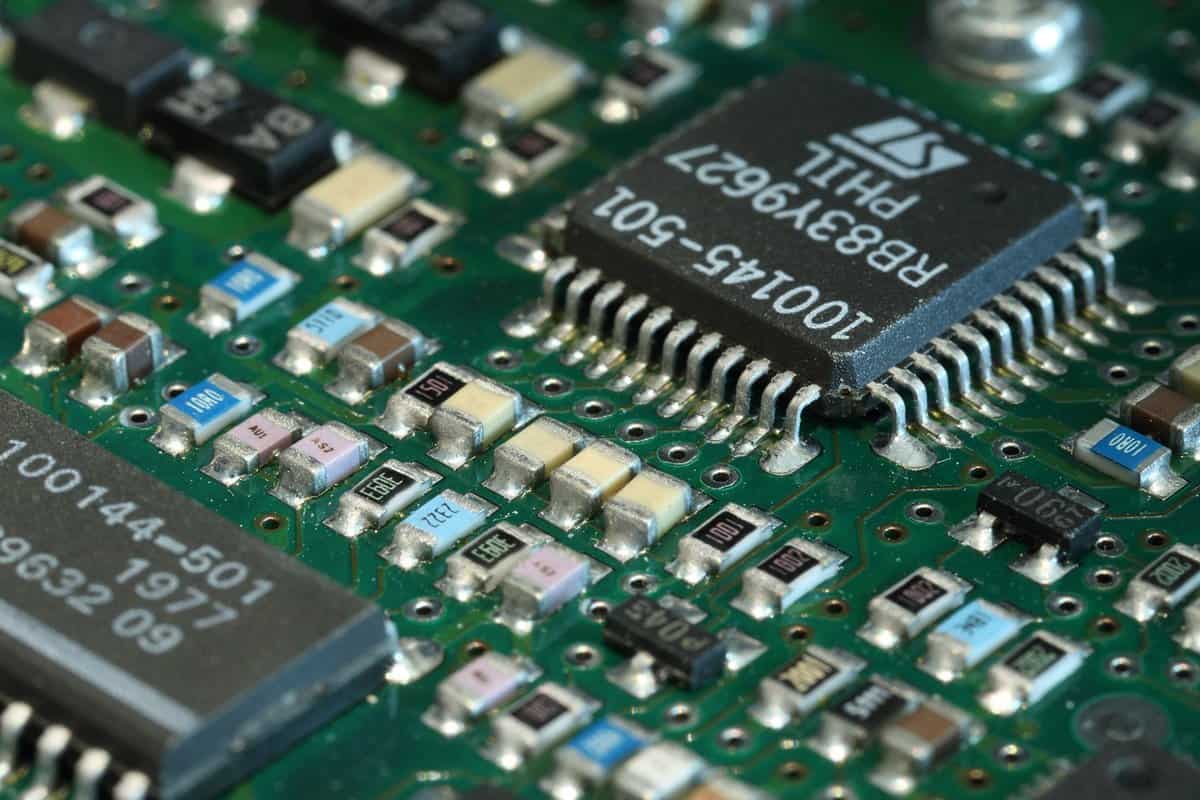
Las placas de circuito impreso, o PCB, son la base de la mayoría de los dispositivos electrónicos y se consiguen mediante el proceso de fabricación de PCB. Se fabrican superponiendo finas láminas de cobre sobre un sustrato no conductor y, a continuación, grabando el exceso de cobre para crear el patrón de circuito deseado.
Las placas de circuito impreso pueden ser muy sencillas, con sólo unas pocas trazas de cobre, o extremadamente complejas, con varias capas de circuitos interconectados, formando efectivamente una malla 3D. El proceso de fabricación debe controlarse cuidadosamente para garantizar que la placa de circuito impreso acabada cumpla las especificaciones deseadas sin que falte ningún contacto o sea intermitente.
Existen varios métodos para crear un patrón de circuito en una placa de circuito impreso. La elección del método dependerá de la complejidad del patrón deseado. Los métodos más comunes, utilizados también en los 2 vídeos siguientes, para crear patrones de circuitos en placas de circuito impreso son la fotolitografía y el grabado.
Pasos de la fabricación de PCB

- Photolithography is a process of using light to create the desired circuit pattern on the PCB. This first step of the PCB manufacturing process begins with the application of a photosensitive resist onto the PCB surface, which is then selectively exposed to ultraviolet light through a mask that contains the desired circuit pattern. The exposure hardens the photosensitive material in the areas corresponding to the circuit design, while the unexposed areas remain soft and are subsequently removed during the development phase. This leaves a detailed pattern of the circuit on the board, allowing for the etching of the underlying material to create conductive paths. Photolithography allows for high precision and repeatability, making it possible to produce complex and densely packed circuits that are essential for modern electronic devices.
- Grabado: El siguiente paso consiste en grabar el cobre expuesto para crear el patrón de circuito deseado. Hay muchos productos químicos diferentes que se pueden utilizar, dependiendo del tipo de cobre que se utilice y de los resultados deseados. Una vez aplicada la solución de grabado, reacciona con el cobre expuesto, erosionándolo eficazmente mientras que las zonas protegidas permanecen inalteradas. Este método permite la creación precisa y eficaz de diseños de circuitos complejos, por lo que es un paso vital en la fabricación de dispositivos electrónicos. Con el tiempo se han desarrollado técnicas y equipos de grabado avanzados para mejorar la precisión y reducir el impacto medioambiental, mejorando aún más las capacidades y la sostenibilidad de la producción de placas de circuito impreso. Una vez finalizado el grabado, se retira la fotorresistencia restante, dejando sobre la placa de circuito impreso el patrón de circuito deseado.
- The next step is the application of solder mask, a protective layer that insulates the copper traces and prevents solder bridges during component placement. This is typically done through a process called solder mask application, where a liquid photoimageable film is applied and then cured using UV light.
- Next, the silkscreen process is employed to print component identifiers, logos, or other necessary markings on the board. Following this, the boards undergo a surface finish process, such as hot air solder leveling (HASL), immersion gold, or other methods, to prepare the copper pads for soldering by enhancing their solderability and protecting them from oxidation.
- Drilling is another critical step in PCB Manufacturing, where precise holes are created for component leads and vias, often using computer-controlled machines to ensure accuracy. Once drilling is complete, the boards may undergo plating to coat the drilled holes with copper, creating electrical connections between different layers.
- Finally, electrical testing ensures that the PCB functions as intended by checking for shorts, opens, and other defects. Each of these processes is vital to producing a reliable and high-quality printed circuit board ready for assembly.
Estos pasos se muestran con mucho más detalle y explicaciones en las dos fábricas de placas de circuito impreso que se muestran a continuación, desde la entrada de pedidos hasta el control y el embalaje, logrando los impresionantes KPI de
- tiempo total de entrega desde la recepción del pedido hasta el envío: de 2 a 4 días
- Más de 5000 pedidos al día
y esto para pedidos unitarios, no necesariamente clientes que regresan, para profesionales y no profesionales -lo que implica posibles errores en la demanda-, y algunos controles de diseño y calidad a lo largo del proceso. ¡Inspírese!
At PCBway:

And then how its main competitor does it, JLCPCB

Para más información sobre el vocabulario electrónico, los tipos de placas de circuito impreso y las huellas de los componentes, consulte el post detallado sobre placas de circuito impreso y electrónica de referencia o Wikipedia. Fabricación de PCB página.
Lecturas y metodologías relacionadas
- Just-In-Time (JIT) inventory management in PCB factories: analyze how JIT inventory methods can reduce holding costs and improve manufacturing efficiency.
- PCB design software: discuss various software tools and techniques for designing PCBs, including schematic capture and layout design.
- Material selection for PCBs: examine the different materials used in PCB manufacturing, such as FR-4, polyimide, and metal-core, and their impact on performance and cost.
- Thermal management in PCBs: investigate methods for managing heat in PCB design and manufacturing, including thermal vias, heat sinks, and thermal interface materials.
- PCB testing and inspection techniques: detail various testing and inspection methods, including automated optical inspection (AOI), in-circuit testing (ICT), and functional testing.
- Environmental considerations in PCB manufacturing: discuss the environmental impact of PCB manufacturing and methods for reducing waste and harmful emissions.
- Advanced PCB technologies: explore advancements in PCB technology, such as flexible PCBs, HDI (High-Density Interconnect) PCBs, and multi-layer PCBs.
Enlaces externos sobre fabricación de placas de circuito impreso electrónicas
Normas internacionales
Enlaces de interés
(Pase el cursor sobre el enlace para ver nuestra descripción del contenido)
Glosario de términos utilizados
Automated Optical Inspection (AOI): un proceso que utiliza tecnología de imágenes para detectar defectos en placas de circuitos impresos y otros conjuntos electrónicos mediante el análisis de datos visuales frente a criterios predefinidos, lo que garantiza el control de calidad y el cumplimiento de las especificaciones.
Computed Tomography (CT): Técnica de imágenes médicas que utiliza rayos X y procesamiento informático para crear imágenes transversales del cuerpo, lo que permite una visualización detallada de las estructuras y tejidos internos. Mejora la capacidad diagnóstica al proporcionar representaciones tridimensionales a partir de datos bidimensionales.
Cost Per Click (CPC): Un modelo de precios de publicidad digital donde los anunciantes pagan una tarifa cada vez que se hace clic en su anuncio. Mide la rentabilidad de las campañas online, calculada dividiendo la inversión publicitaria total entre el número de clics recibidos.
Just In Time (JIT): una estrategia de producción que tiene como objetivo reducir los costos de inventario al recibir bienes solo cuando son necesarios en el proceso de fabricación, minimizando así el desperdicio y aumentando la eficiencia.
Key Performance Indicator (KPI): un valor medible que demuestra la eficacia con la que una organización está logrando objetivos comerciales clave, a menudo utilizado para evaluar el éxito en el logro de metas.
Printed Circuit Board (PCB): Una placa plana de material aislante que soporta y conecta componentes electrónicos mediante vías conductoras, generalmente grabadas a partir de láminas de cobre. Sirve como base para el ensamblaje de circuitos y facilita las conexiones eléctricas entre componentes.












Interesting read! Anyone else think the advancements in PCB manufacturing could potentially disrupt traditional methodologies?
¡Tiempos de respuesta tan rápidos para miles de pedidos diarios! ¡Y los videos son viejos! ¡Es probablemente más por ahora!
La inclusión de los vídeos ofrece una gran perspectiva visual de los intrincados procesos necesarios para lograr tal precisión y velocidad.
Es fascinante ver cómo el intrincado proceso de fabricación de placas de circuito impreso puede completarse en sólo 2 ó 4 días con tanta eficacia y precisión. Los vídeos de PCBway y JLCPCB ofrecen una gran perspectiva del sector y ponen de relieve las impresionantes capacidades de las técnicas de fabricación modernas.
Interesting read on PCB manufacturing. But, wouldnt adopting AI automation speed up the process & improve efficiency significantly?
Interesting read, but isnt there a more eco-friendly method to dispose of PCB waste? Whats the industry standard?
Publicaciones relacionadas
Estrategia de Control de la Contaminación y Mejores Prácticas para Salas Blancas 26
De GMP a cGMP: la Guía Completa para Dominarlas
Validación del Proceso IQ OQ PQ: Teoría y Práctica Completas
Las estrategias del “Loco Solitario”, del “First Follower” y del “Fast Follower”
Los 20 Mejores Usos de los Proxies en Ingeniería
Cómo Vender Hielo a los Esquimales (o Estrategias de Marketing)